A tired conservatory originally built approximately 50 years ago. The roof had been replaced about 15 years ago but not to a good standard.
The customer a 95yr old uses the conservatory during the summer months ‘to sit and relax in’ and wanted a timber replacement. Joinery grade Redwood finished with a white primer, and a Hardwood cill for the main structure was used with 24mm double glazed units and a triple wall 16mm polycarbonate roof finished the job off nicely. All the window frames and the cill I manufactured prior to installation.
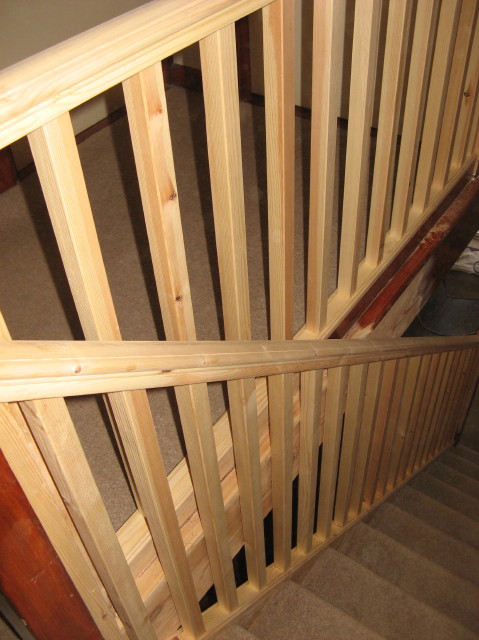
This crown cap handrail was left unpainted so that the grain and beauty of the wood can be seen, with this in mind I took my time selecting the wood for a clean straight grain without any knots.
The sweep from the bottom of the stairs to the top is unbroken therefore there are no breaks in the handrail on the corner or where the pitch changes. This is important for less mobile people who need the reassurance of something to get hold of for support whilst going down or up the stairs.
The wall that the handrail is fitted to is a stud wall, made up of plasterboard tacked to a timber frame so in effect a hollow wall. I used a specialist fixing to fix the brackets one which ‘balloons’ out behind the plasterboard and into the cavity. All in all a neat and tidy job.
Crown Cap is not used so much these days I have only one supplier who stocks it, and only in soft wood. I do have cutters to machine crown cap myself although such a small run would not warrant the time it would take. I think crown cap is easier to use as a handrail particularly if ones grip is not what it used to be. Also it can be screwed directly to the wall rather that hung on brackets, that’s useful if you are restricted on space.
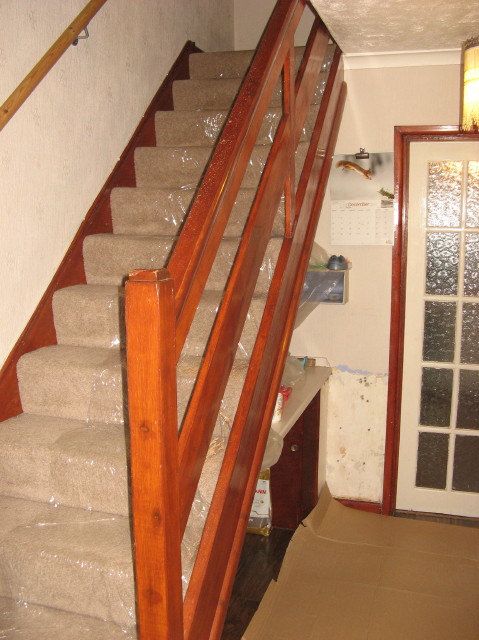
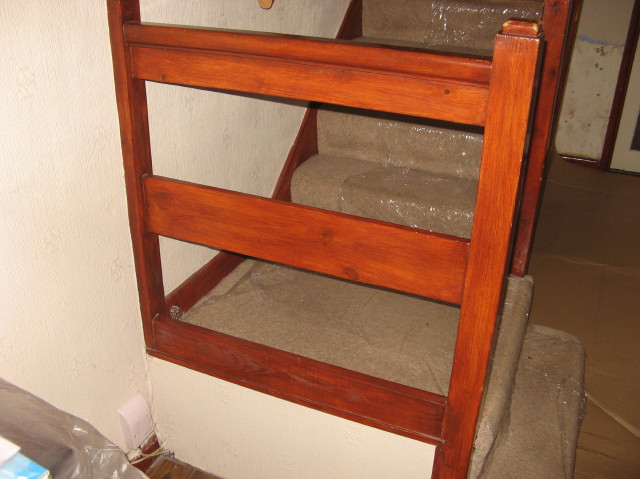
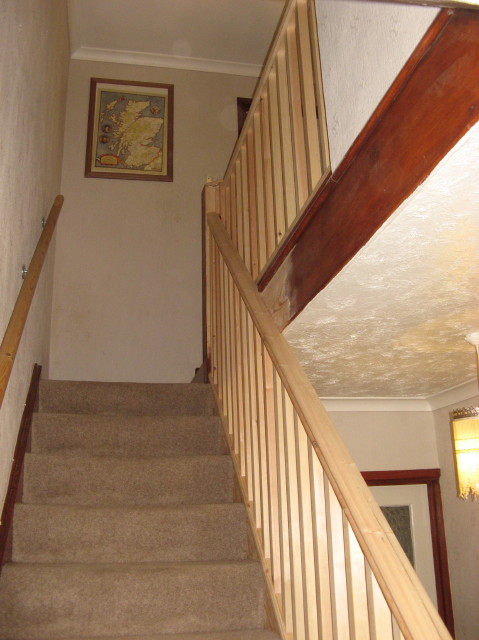
The above is a boarded stair, as opposed to using spindle’s, this was popular in the 1970s and 80s. It is no longer allowed unless the gap between each board or boards and hand/base rail is less than 100mm (4”) . This regulation applies to spindles as well. The regulation prevents the potential for young children and babies getting their head wedged in the gap. There has been truly tragic cases although thankfully few, of very young children accidentally hanging themselves as a result of there being a greater than 100mm opening between spindles or boards.
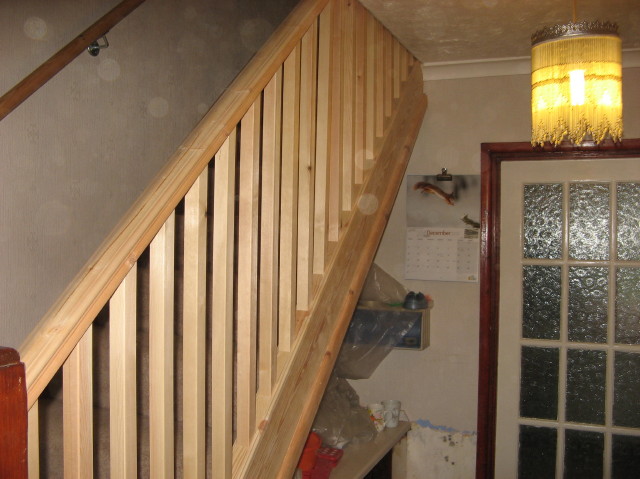
I removed the boards along with the handrail. The Newel posts were left insitu. Replacement stair components were fitted. Not only does this bring the stair case up to date with current regulation the new stair components also lighten up the hall and landing. A painter and decorator was on site at the same time as me so he was then able to sand down the apron and other areas of the stairs that would be inaccessible before the new components were fitted.
My understanding is that the customer wishes to have the whole lot brought back to wood and then finished in a varnish.
When I removed the boards I realised they are Parana Pine, this is a timber that is no longer obtainable in the u.k or any where else for that matter as the species is now endangered and there is a ban on its use. I am going to make some small boxes with this wood and will add some images once I have made them. I kike the idea of making good use of old wood, I can not think of any other material that can be transformed from one object or use to another, that is carbon neutral, and benefits the soul whilst being grown, gives pleasure to the eye and has shaped our lives in so many ways. Yep you got it—I Like wood.
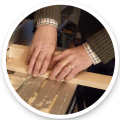
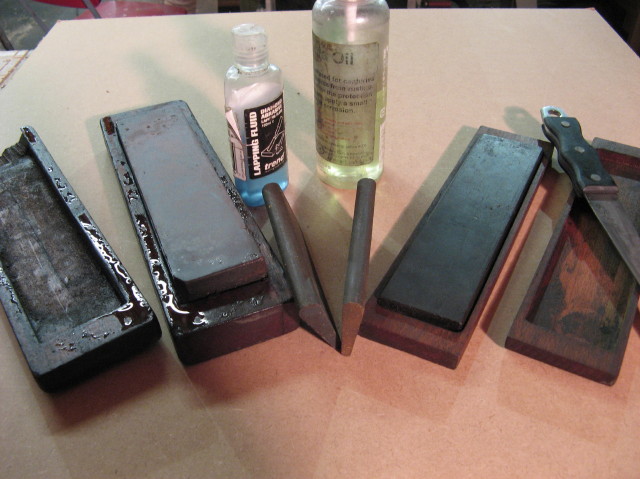
My carpentry chisels Carpentry sharpening wheststones
I know of no other trade except perhaps a good all-round mechanic who requires so many tools in order to undertake their work. A brief look at online suppliers or trade catalogues will reinforce this statement.
However, there are tools and then there are quality tools that to those in the trade hold a certain beauty. You can feel the quality and using good well-made hand and power tools is reflected in the overall quality of a finished project or article being made.
Of course, for those who have no desire or need to undertake such tasks and who may only use a power drill for instance maybe twice a year, there is no need to invest in high end expensive tools and equipment. But for those of us who day in day out rely on precision and performance there can be no compromise.
I still use some of the hand tools that as an apprentice was instructed to buy namely a few chisels and planes along with hand braces and hand saws. My chisels some of which have now been discarded as the iron has been ground and sharpened so many times as to render the chisel to short are one of those essential hand tools that I was told to get.
The company where I served my time used to deduct £1 a week from my wages for tools, given that my take home pay was the princely sum of £12 the £1 deduction was noticed. Once or perhaps twice a year the foreman would then hand over a selection of tools that the company had purchased for the apprentices. It was a system that worked well, and I guess the buying power of the company ensured a generous discount therefore we built up over the course of an apprenticeship, in my case 5years, a well-stocked tool chest.
The tool chest was made during the first year of an apprenticeship from Mahogany would you believe! And all the joints were dovetailed including the insert trays. This became your pride and joy in the work place and the tools that filled it your passport to earning a living. This was back in 1978 so portable power tools which were just showing up in the boat yard were for the men not the boys.
I still have my tool chest.
The insistence on quality and well looked after tools could also be seen when on Friday afternoon an hour or so before clocking off nearly all the joiners and boatbuilders turned to their tools and sharpened them ready for the following week along with any minor maintenance issues perhaps adjustments to plane irons or the sorting of drill bits etc. The company didn’t seem to mind this down time perhaps it had been negotiated I don’t know but I wonder if it’s a practice that is still going on in industry. It’s a habit which not necessarily practiced on a Friday I still undertake as a specific task.
I have seen a revolution in portable power tools since my first power drill in the 1980s, routers especially can now undertake tasks that were not possible back then and skill saws that run on tracks make light work of sheet materials that need to be cut.
The tools of my trade and the tools that I own are an intrinsic part of being a carpenter. The saying that a bad tradesman always blames his tools may be true, but a good tradesman only uses good quality tools.
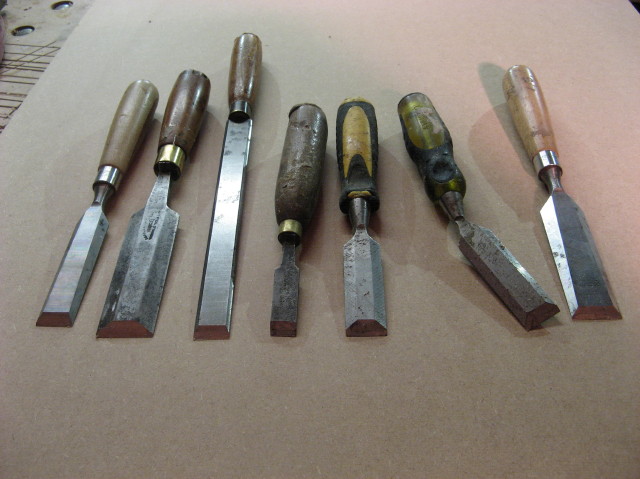
As you can see the chisels shown at the beginning of this article are well worn, these are my everyday chisels that I carry around from job to job and form a small part of my overall mobile tool kit.
The second from the right was deliberately bent as I needed to get into an awkward corner whilst fitting spindles and handrail. There are generally three types of chisel available from most tool outlets that I use.
The Bevelled edge chisel which is bevelled along both edges, this is used for general light joinery the advantage of having the bevels is that it can be used to undercut housings in mortices and dovetail work.
The Firmer which is becoming increasingly harder to find has a stout blade without the bevels on each side and can be struck smartly with a mallet, I use this for more demanding carpentry.
The Paring chisel which is becoming even harder to find has a longer blade usually around 7-9” depending on the width of the blade but older ones were up to 12” in length these are used to trim long grooves or as the name indicates to par wood. This is the chisel I use most of all and because of its extra length you have more control over it.
Other types include:
The Mortice chisel which as the name suggests is generally used for cutting mortices.
Firmer Gouge used to cut hollow or curved shoulders.
Swan Neck used to cut deep blind recesses.
All Steel chisels, these are made from one piece of steel with no wooden handle and be struck hard with a hammer so are ideal for heavy site carpentry.
I am always on the lookout for old chisels with reasonable stock, old would be pre 1970. The steel used then to manufacture them is superior to the steel used nowadays, so they keep their edge longer. If you have any old chisel lying around in an old tool box in the garage – then I’m your man, give me a ring or use the contact page and I will be interested in buying them.
When it comes to sharpening, I try to maintain a bevel of 25 degrees, many carpenters then go on to hone the cutting edge to 30 degrees, but I was taught to stop at 25. There are plenty of videos on youtube and other platforms that show you how to grind and sharpen chisels and I am sure the world really doesn’t need another one, so look there for advice on sharpening. My only advice would be to use a fine good quality oil for the final honing on a good quality, preferably natural oil stone.
Rot had set in at the base of this post, a common problem. The replacement portion was 800mm long a hardwood key was also inserted to prevent any slip on the joint.
I could have also used a stepped Scarf joint which would have had the same effect as the hardwood key. Because the overall height of the porch was 3.5meters I was concerned that there could still be some movement in the post -possibly buckling , so it was decided to add a handrail and spindles at the end of the porch. This prevents potential buckle in the post and also I think finishes the job off nicely.
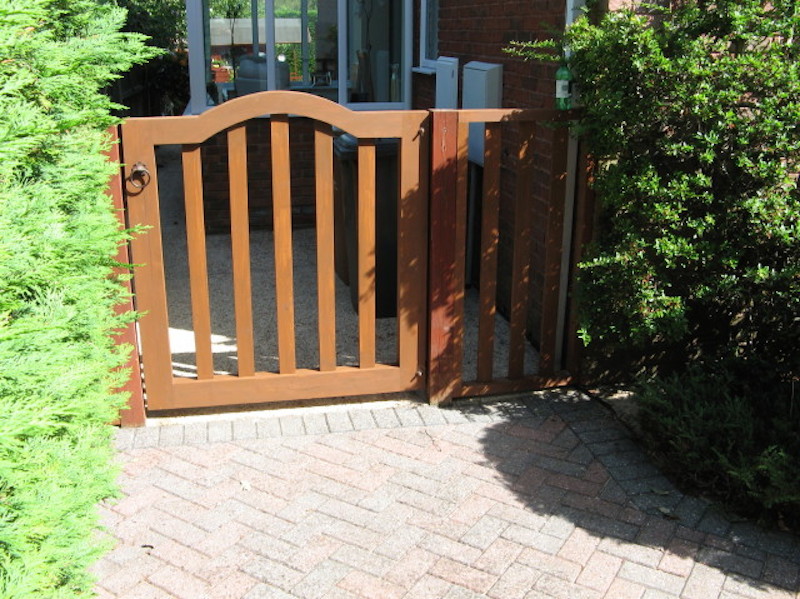
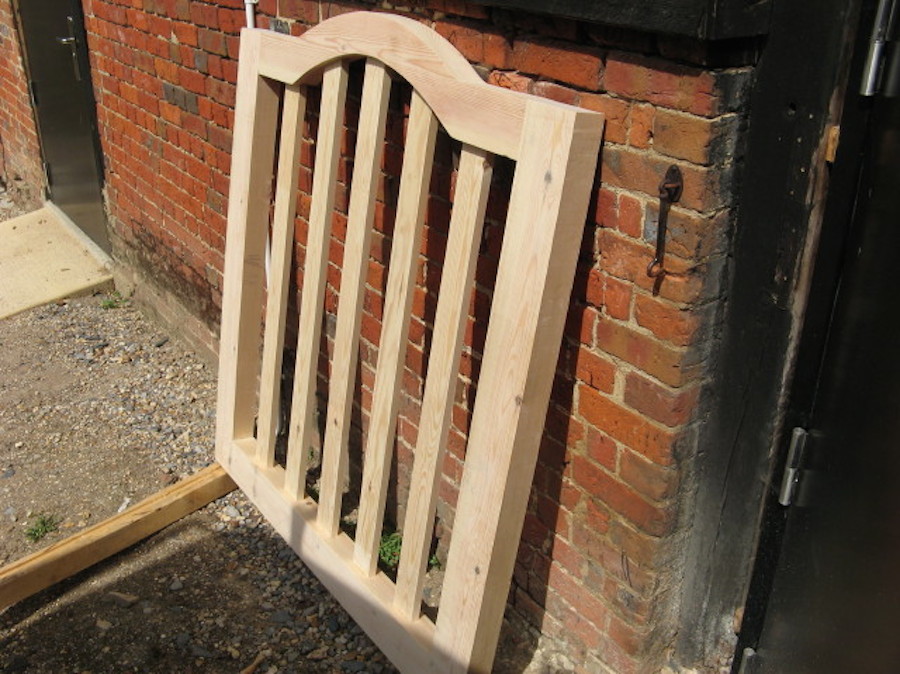
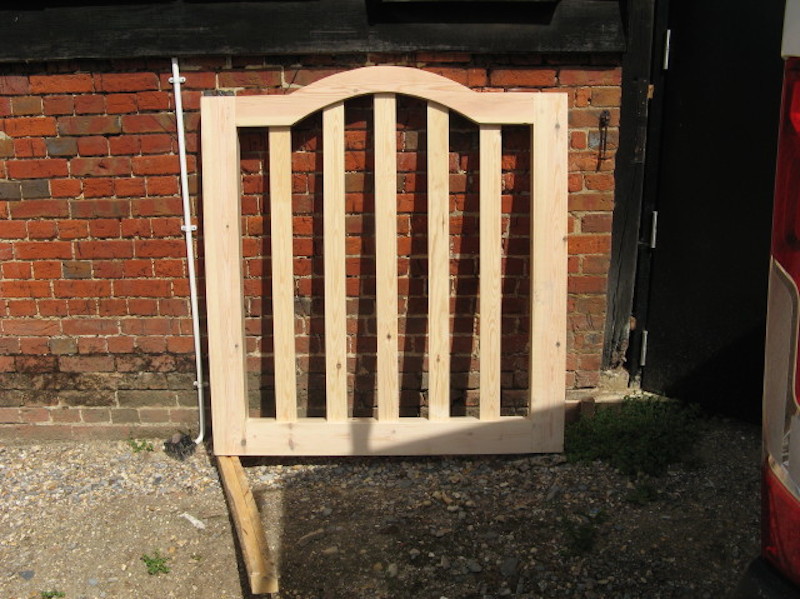
This is a copy of the original which had rotted beyond economic repair. For me this was an interesting project because it involved some curved work which does not come up that often so it gave me a chance to blow off the dust on the bandsaw and use it to achieve the curve. Each mortice and tenon joint was pegged using ¾” Oak dowel as well as glue. This will ensure that the joints remain tight. The old gate had rotted because the joints had opened and rain water had sat in the shoulder between the stile and rails.
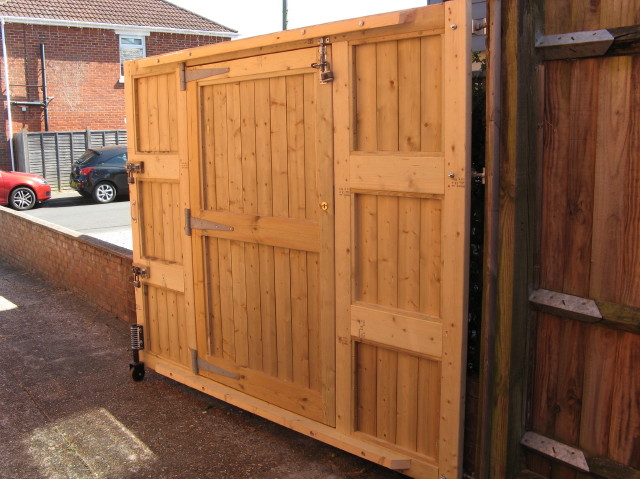
A single driveway gate with an entrance door fitted in the middle. These gates are heavy so a jockey wheel has been fitted to take the stress off the hinges thus ensuring that the gate will not drop over time. The door opens independently or the whole gate can be opened as a single leaf. Manufactured from tannalised softwood for the frame and tannalised tongue and grove for the panels this should last. Overall its 2.6 Meters wide and 2.2 Meters high. The images accompanying this show the manufacturing then the final piece in situ.